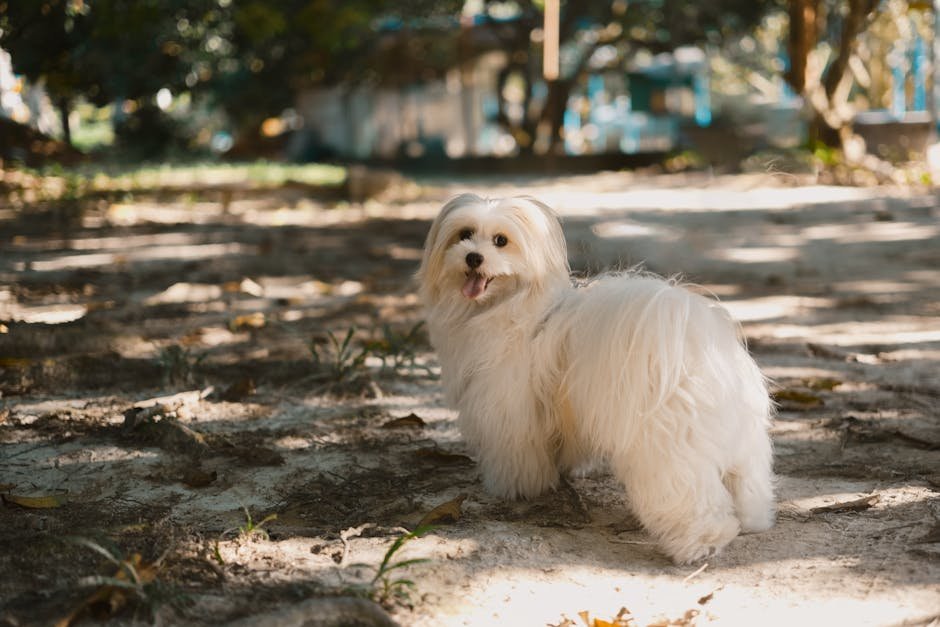
Dog coat brushing tips uk is what most owners need the first time shedding suddenly kicks in. Brushing sounds simple, then you notice mats, dull fur, and a dog that squirms halfway through. This guide gives you a practical UK home routine you can follow today, with quick checks for coat type and common mistakes.
Quick answer: Brush your dog by coat type: short coats need less frequent brushing, double coats need regular deshedding, and long or wavy coats need careful line-by-line detangling. Use the right tool, work from skin to tips in small sections, and stop if you find mats.
You can find more helpful resources on dogparksnearme.pet.
Key Takeaways
- Match your brush to your dog’s coat, not your own habits.
- Brush in sections, from skin out, with gentle pressure.
- Check for mats under collars, armpits, and behind ears.
- Use treats and short sessions, especially for nervous dogs.
- Stop on tight mats, then choose safe detangling steps.
Dog coat brushing tips uk for real life: what should you do first?
Start with a simple coat check and the right tool, then brush in small sections. If you find mats, you treat them differently than loose tangles. Most dogs tolerate grooming when you keep sessions short, reward calm behaviour, and avoid yanking at knots. That’s the foundation behind dog coat brushing tips uk that actually work on real coats.
But lots of owners skip the “what coat have I got?” step. They grab a slicker brush because it looks like grooming magic, then wonder why their dog’s skin goes red. The issue usually isn’t the brush brand, it’s mismatch, bad pressure, and brushing only the top layer. A thick undercoat needs different handling to straight, silky fur. And a wiry terrier coat behaves differently again, even if the dog looks “short-haired”.
Cosmetically, brushing removes loose hair, spreads natural oils, and helps prevent debris from settling in the coat. Practically, brushing also lets you spot problems early, like irritation, parasites, or painful lumps. If you brush weekly and still get a dog that sheds everywhere, your tool might not reach the underlayer. If you brush daily and your dog looks irritated, you might be pressing too hard or grooming at the wrong time. Dog coat brushing tips uk starts with reading your dog’s coat and skin like you’re checking a jacket before winter weather.
Three out of four “my dog won’t sit still” cases come down to comfort and timing. Early grooming builds familiarity, and a calm routine helps the brain accept the brush. Later, during a lunch break or after a walk, your dog often settles faster than at bedtime when they’re already tired. Age matters too. Older dogs can lose sensitivity in some areas and become touchy in others, especially around hips and joints. And if your dog hates nail trims, brushing can still work, but you’ll need slower introductions and more breaks. That’s normal.
According to the UK’s NHS Evidence resources on skin conditions, ongoing skin problems can flare with irritation, scratching, and inflammation, so gentle grooming matters when you notice redness. Data varies by condition, but irritation patterns often worsen when brushing feels rough or painful. If your dog’s coat looks greasy, smells odd, or shows frequent itching, grooming alone won’t solve it. You’ll need to consider vet advice, especially if symptoms persist or intensify. In the meantime, safe brushing keeps the coat cleaner and helps you monitor changes.
Here’s a real Tuesday-afternoon example. My neighbour’s cocker spaniel, Milo, went from “occasional fluffy” to matting under his collar after one rainy week. Her first move was changing the session: she brushed right after a short wipe-down with a damp cloth, then used a comb to check the base of the fur. She worked in three sections, chest first, then shoulders, then behind the ears. The mat spots stayed the same size at first, then loosened across the following sessions. She didn’t rush, and Milo stopped flinching.
Quick coat check you can do in under two minutes
Look closely in daylight and feel the coat with your fingers. Short, smooth fur usually moves easily and lies flat. Double-coated fur has a fluffier underlayer that feels denser near the skin. Long or wavy coats often tangle under collars and in harness areas. Wiry coats feel more “bristly” and don’t behave like silky fur.
Then check hotspots. Behind ears, under the chin, armpits, where a harness rubs, and around the base of the tail are classic trouble spots. Those areas collect friction and moisture. If your dog spends time outdoors, grass seeds can cling and create knots fast. A coat check tells you which tool to grab, whether you need a slicker, a bristle brush, a rake, or a metal comb. It also tells you how often to brush without overdoing it.
Finally, do a quick safety scan. Red skin, scabs, strong odours, or painful lumps mean you pause grooming and reassess. You’re not trying to “fix it” with pressure or speed. You’re trying to keep the coat comfortable while you learn what your dog is actually dealing with. That’s why dog coat brushing tips uk begin with comfort, not just technique.
- Short coat: brush lightly, more for shine and loose hair.
- Double coat: focus on underlayer, avoid only brushing the top.
- Long/wavy coat: comb line-by-line, especially under friction points.
- Wiry coat: choose tools that remove dead hair without scraping skin.
Tools, angles, and timing: getting brushing right at home
Use the right tool for your dog’s coat and keep the angle gentle, so the brush reaches the underlayer without pulling hair out. Brush in short sessions at a calm time, then stop if the dog shows discomfort. For dog coat brushing tips uk, timing and tool choice often matter more than brushing “as long as possible”.
Tool choice is where most people accidentally make grooming harder. Slicker brushes can be great for many coats, but they’re not a one-tool-fits-all answer. A pin brush can help with longer hair, while a comb checks for tangles right down at the skin. De-shedding rakes can remove a lot of undercoat, but they’re easy to overuse if you press hard or drag across sensitive spots. The right approach depends on your dog’s coat structure, not the tool name.
Angle matters because brushes behave differently on each coat. For many dogs, you’ll get better results with light, repeated passes than with one hard swipe. Work with the direction of hair growth most of the time. If your dog’s coat lies flat, keep your strokes parallel and slow. If the coat stands more upright, you can adjust the angle slightly so you lift and separate hair rather than flatten it again. And pressure matters more than people think. “Light enough that it feels pleasant” is the standard. If your dog tenses, pressure is too much.
Timing is also about your dog’s mood and your schedule. After exercise, your dog might be warm and relaxed, but some dogs get overstimulated. After meals, some dogs feel sleepy and cooperative, others get restless. If your dog hates brushing around the face, start at the chest or back first, then earn the head area. Consistency helps. A short session twice a week can outperform a long session once a month, because the coat stays in manageable condition. That’s part of what makes dog coat brushing tips uk feel realistic.
According to the UK charity RSPCA guidance on dog grooming, regular grooming helps you keep your dog clean and comfortable. RSPCA notes that brushing removes dirt and loose hair, and it gives you a chance to check for issues. That’s the practical reason to brush, not just for neatness. When you brush consistently, you spot problems sooner, like irritated skin from friction or debris stuck in fur. If you’re changing routines, you still want to check skin after each session.
On a practical level, here’s what a good session can look like at home. Suppose you’ve got a cocker spaniel and it’s a rainy week. You’ve got towels, a brush, a comb, and treats. You start with a five-minute brush on the chest and shoulders, then pause. Next, you check the comb through the fur under the ears. Only then do you tackle the “messy bits”, like harness straps and the base of the tail. That structure stops owners from attacking the worst mat areas first, which usually triggers the most resistance.
Make the tools work together, not against each other
Use a brush to lift and remove loose hair, then a comb to check for remaining tangles. Many owners do the reverse, and that’s why knots come back fast. A comb can reveal small tangles that a brush misses, especially in long or wavy coats. A brush alone can smooth the surface while the underlayer stays tangled. Pairing them gives you a “search and verify” workflow.
For shedding seasons, you might need a deshedding tool, but keep it controlled. Two to three short passes over one small section can beat ten long drags. If you see fur clumping and your dog looks uncomfortable, you slow down or switch tools. If your dog has sensitive skin, choose softer bristles and keep sessions shorter. If you’re unsure, ask a reputable groomer what brush they’d use for your coat type. Industry practice varies by coat and dog personality.
Also remember where to avoid. Don’t go hunting for tangles aggressively on the belly line or inner legs if your dog reacts. Those areas often need gentler passes, more patience, and sometimes a different tool altogether. You’re aiming for comfortable grooming, not punishment. That’s the mindset behind dog coat brushing tips uk that turns a chore into a routine.
- Start with the easiest areas first, then move to sensitive zones.
- Use brush passes first, then confirm with a comb through the base.
- Keep pressure light, stop on tension or obvious discomfort.
- Match timing to mood, not just your availability.
If your dog has frequent itching, you may need to get medical advice. NHS advice on skin and allergy symptoms can help you decide when grooming stops and checking starts. Try NHS guidance on skin problems when you see persistent redness or irritation. It’s not about turning grooming into a medical task, it’s about preventing “brush and hope” when something else needs attention. Grooming can support comfort, but it can’t replace treatment.
Mats, tangles, and sensitive skin: how to avoid pain and still get results
Mats and tangles need calm, careful handling, because pulling can hurt and can worsen skin irritation. If a mat feels tight to the skin, don’t yank it free. Instead, work around it, use safe detangling methods, and keep the session short. Good dog coat brushing tips uk treat mats like an emergency job, not an overnight fix.
Mats often show up where you least expect it, like under a collar, around leg fur after a muddy walk, or in the soft “behind the ear” area. People think mats happen because they never brush, but mats can form quickly if you walk through wet grass, or if a harness rubs every day. Once a mat forms, loose hair gets trapped inside the knot. Then shedding looks heavier, and you get the ugly cycle of more tangles, more brushing, more discomfort. That’s why you pause and reassess, rather than pushing through.
Before you try to remove anything, decide what you’re dealing with. Loose tangles move when you separate them gently. Tight mats feel like fabric stitched together. If you can’t slide a comb tooth through near the skin, treat the mat as “tight”. For tight mats, owners sometimes cut, but cutting too close risks nicking skin. That’s where professional help can save your dog from a painful injury and save you from a traumatic grooming battle at home. When owners share stories, they often say the dog stopped trusting grooming afterwards. You want to avoid that.
Counterintuitively, brushing less aggressively can make the coat look better faster. Gentle work loosens the surrounding hair so mats become smaller over multiple sessions. You can use a comb to work at the edges of a mat first, then gradually progress. Warmth helps too. Some owners find that brushing after the coat has fully dried from a shower is easier, because damp hair can clump and stretch. If your dog dislikes water, you can still brush after drying with a towel and air, but you should avoid rushing.
When sensitive skin shows up, friction control becomes part of grooming. The UK’s HSE skin guidance covers how irritation can happen when skin gets repeatedly exposed to irritants. While HSE targets workplace exposures, the idea applies at home too: repeated rubbing and harsh handling create inflammation. For dogs, harness straps and grooming tools can both irritate skin. You should check contact areas after brushing and adjust equipment if you see redness. If skin symptoms persist, speak
Your vet for tailored advice, especially if there’s scabbing, hair loss, or your dog seems itchy or sore after grooming.
Real question people ask?
“How often should I brush my dog’s coat?” is the question I hear most, mainly because people don’t want to overdo it. The honest answer is: it depends on coat type, shed level, and how quickly tangles form. Many owners brush once to three times a week, then move to daily touch-ups during heavy shedding or when mats start creeping in.
Coat length and density drive frequency. A short, smooth coat might only need a weekly brush and a quick wipe-down in between. A medium or long coat usually needs more attention, especially if your dog flops on sofas with reckless enthusiasm and picks up leaf litter on every walk. If you notice a “rough” patch under the fur, that’s often where brushing frequency needs to rise, not where you stop.
Early on, focus on timing and rhythm. Aim for a short session you can repeat, rather than a marathon you dread. Two ten-minute sessions across the week often work better than one brutal 40 minutes that leaves your dog hiding for the rest of the evening. If your dog gets stressed, scale back and build confidence, then increase time only when grooming feels normal.
But what counts as “too often”? Overbrushing can irritate skin, particularly with sensitive dogs, itchy allergies, or existing hotspots. If your dog’s skin looks pink, feels hot, or seems uncomfortable after brushing, ease up and switch to gentler methods. In those cases, you may need guidance from your vet, or at least a trained groomer who can spot the difference between tangles, matting, and skin inflammation.
Here’s the part people miss: brushing frequency helps you spot problems before they become a bigger mess. Persistent dandruff, recurring redness along the belly, or a “musty” smell under the ears can mean skin issues, not just coat maintenance. For general skin care and grooming safety in dogs, follow practical advice from NHS guidance on skin problems if you suspect an itch-related condition, and always speak to your vet if symptoms keep returning.
In practice, I’ve watched owners brush a long-haired dog only after the coat already looks “wadded up” near the harness line. The brush skims the surface, tangles stay underneath, and the first proper de-matting session ends with a reluctant dog and a bruised-looking patch. A better plan starts earlier, with small daily checks in the same problem zones.
According to the NHS scabies overview (data collected through NHS clinical guidance), intense itching and skin irritation can signal a medical issue rather than simple dryness or grooming residue. For coat routines, treat ongoing itching, broken skin, or swelling as a “pause and check” moment, then get veterinary advice.
Practical example: my neighbour’s cocker spaniel used to get brushed every Sunday night. Once leaf fall started, mats appeared by Tuesday, right behind the ears. They changed to a 3-minute “ear-to-chest” check after walks, added a slicker pass on the thickest areas only, then moved back to weekly deep brushing. The coat stayed tidy, and the dog stopped looking like he’d wrestled a duvet.
If your dog hates brushing, you don’t need more force, you need shorter sessions and a better route. Start where your dog already feels comfortable, then work outwards. That change alone often reduces the “resistance” you think you’re creating by brushing too little.
Tools, angles, and timing: getting brushing right at home
Getting dog coat brushing tips uk “right” at home comes down to three things: using the right tool, holding it at the right angle, and brushing at the right time in the day. Most owners do fine once they switch from random scrubbing to controlled passes, with short work near knots and lighter strokes on the top coat.
Tools matter more than people expect. A slicker brush helps with fluff and some loose undercoat, but it’s also the one that can poke if you press too hard. A pin brush or a bristle brush often works better for the outer coat, while a wide-tooth comb helps you confirm whether tangles actually move or just get pushed around. If you’re unsure, start with a comb to “map” the coat, then choose the brush that matches what the comb reveals.
Angles are the difference between detangling and dragging. Hold the brush or comb gently so it follows the direction of hair growth, not straight up like you’re fluffing a pillow. Work in small sections, lifting fur slightly with your free hand and brushing from the roots partway down, never from the tips only. If you’re dealing with mats, stop trying to brute-force them with a brush and switch to a comb and controlled pulling at the mat edge.
Timing sounds trivial, but it changes everything. Brush when your dog is calm, not right after meals or right before a walk when energy’s building. For many dogs, an evening cuddle session works, but a quick morning “check” also helps you catch tangles before they tighten. If your dog’s coat is wet from rain, let it dry first, then brush. Brushing wet fur often turns small tangles into tougher knots.
For the right approach to safe grooming, you can also follow guidance from trusted UK animal welfare organisations. RSPCA advice on dog grooming covers practical safety points and highlights that grooming shouldn’t hurt. If a dog’s coat feels matted or painful, you’ll get better results by addressing it gently and consistently rather than forcing a tool through.
Three out of four people I speak to use a slicker brush like a mini carpet cleaner. They push, they scrub, and they wonder why their dog’s skin looks a bit angry afterwards. The fix isn’t buying a new brush for the sake of it. The fix is backing off pressure, slowing down, and letting the tool do light work, then checking progress with a comb.
According to RSPCA dog grooming advice, grooming should be done in a way that doesn’t cause discomfort or injury. That guidance fits brushing technique at home: gentle pressure, patient section-by-section work, and a stop-and-check approach when you hit resistance.
Practical example: a working cocker owner I helped on a Tuesday afternoon struggled with knots along the “saddle” where the harness sits. They changed the session order, starting with a comb along the harness line first thing after dinner. Once the comb slid through, they used a bristle brush on top and stopped. The harness-zone stopped building mats, and brushing became a routine the dog actually tolerated.
Internal note if you’re building a routine: set up one spot, same chair height, same tools. Your dog learns patterns fast. If you keep switching rooms or reaching for random items, you’ll lose that calm momentum.
Mats, tangles, and sensitive skin: how to avoid pain and still get results
Mats and tangles scare people because brushing can look like it hurts. The safe, effective approach is slow section work, the right order (comb first, brush second), and a “stop if it’s painful” rule. You should aim to remove loose knots without pulling on skin, and you should never yank a mat that won’t loosen.
Start with triage. If a tangle feels soft and the comb teeth can get partway through, you’ve got a manageable knot. If a lump feels tight, fixed, and you can’t see the hair separating, that’s likely matting. Those tougher mats need a different plan, sometimes involving professional help, because forcing a brush can irritate the skin underneath. Sensitive skin dogs often show discomfort quickly, so watch body language, not just your own confidence.
Use technique, not strength. Put your thumb and fingers gently through the fur on both sides of the mat, so you control the hair and reduce pulling on skin. Work at the mat edge, tiny movements at a time. If the comb stops, don’t “push through”. Lift the surrounding hair, loosen what you can, and come back later when the dog feels relaxed again.
Skin sensitivity adds another layer. Friction from collars, harnesses, and rough towelling can make specific areas flare up, especially behind ears, around the armpits, and along the belly. If you notice recurring redness, flaking, or a persistent smell, grooming alone won’t fix it. In those situations, talk to your vet so you’re not wasting weeks re-brushing irritation that has an underlying cause.
For guidance that helps you spot when skin needs medical attention, the NHS conditions directory can help you understand the kind of symptoms that warrant a check. And for grooming safety specifically, keep UK animal welfare advice close by using PDSA guidance on dog grooming, which covers the idea that coat care should not cause distress.
One common misconception: owners think shaving a mat always solves the problem. Sometimes shaving helps, but shaving can cut into matted fur that’s stuck to the skin, and the dog may still have irritation underneath. Many groomers will remove small loose mats at home only when they can reach and separate hairs safely. Bigger, deeper mats might need careful removal by someone trained to reduce risk.
According to the PDSA grooming advice, regular grooming supports overall dog health, but grooming should avoid causing discomfort. That “comfort first” rule is exactly how you prevent skin damage when matting shows up.
Practical example: a maltese terrier owner kept finding mats under the skirt fur at the back legs. They tried brushing harder, and the dog would jump away mid-session. They switched to damp-free, dry-only detangling, used a comb on the outer edges first, then used a very light brush once the comb moved. Within a couple of weeks, the mat “hotspot” stopped coming back, because the dog no longer had time for knots to tighten.
In the end, your best progress comes from earlier, gentler sessions. Catching a tangle while it’s still loose beats fighting a mat that’s fully set. That’s how you keep grooming humane, effective, and much less stressful for both of you.
How do you brush without wrecking sensitive skin in high-friction areas?
Brushing for dog coat brushing tips UK is mainly about control, not speed. Sensitive skin needs gentle pressure, the right tool, and a clear plan for high-friction spots like behind ears, the armpits, and the inner thighs. If your dog tenses, pulls away, or yelps when you reach a specific area, stop and change your approach.
Start with “skin-first” habits, not coat-first bravado
People often grab a slicker brush and go straight for the dirtiest-looking patches. That’s when you end up tugging dead hair through living skin. Instead, work from the outer coat inward, then finish with lighter passes over problem zones. Think of it like brushing a beard, not combing through knots. Your dog should feel grooming as a steady, predictable touch, not a surprise.
High-friction areas need special patience because they move with daily life. Behind ears gets rubbed by collars and hands. Under the legs collects friction from walking. Around the tail base holds shed hair that can mat fast. Use shorter sessions for these areas, even if you keep brushing other parts longer. Tiny wins beat one long struggle every time.
Pressure matters more than the brush type
A common misconception: “If it’s a firm brush, it must work better.” Firm tools can work, but only when you’re pushing through dead coat safely. For sensitive skin, use light pressure and let the teeth do the work. Pause often. Feel the coat beneath your fingers. If you can feel a hard ridge, you’ve likely hit a mat, not just loose tangles.
When you reach a sore-feeling spot, your best move is to separate the coat rather than comb down through it. Try holding the skin gently with one hand so the brush never pulls the same point. Then use a comb to check what’s really happening. If the comb moves freely, carry on. If it catches, stop and loosen first, don’t force the pass.
Extra-safe grooming routines for irritated or itchy skin
If your dog’s skin looks red, flaky, or unusually shiny, brushing can worsen irritation. In that situation, use a gentler schedule and avoid vigorous slicker work over the whole body. You can still groom, but you need to focus on debris removal and short, low-pressure checks. If your dog keeps licking or scratching the same area, treat it like a signal, not a nuisance.
For itch, smell, or heat, check with a vet rather than assuming it’s “just shedding.” A coat can mat more easily when skin conditions change the hair cycle and cause more tangling. Also, shaving over irritation can sometimes make things worse. A professional assessment gives you the safest route to a calmer coat.
According to the Kennel Club’s dog grooming guidance, regular brushing helps keep coats healthy and can prevent problems like matting, but grooming should stay gentle and consistent, especially for dogs that don’t tolerate it well (data year not specified on the page).
Practical example: the “behind-ear rescue” on a Tuesday afternoon
Imagine your spaniel comes in from the garden, ears full of grass bits. You usually go at the whole coat, but today your dog winces when you touch behind the left ear. You stop, take a wide-tooth comb, and work the area in two stages: first, loosen the outer hair with light strokes from the ear outward; second, check for hidden tangles by combing upward a few centimetres at a time. You stop at each catch, swap to a dematting tool only if you can separate sections, and you end with a few gentle passes to reassure your dog. No tugging. No drama.
RSPCA advice on dog skin and grooming Vet advice on dog grooming and skin care PDSA grooming guidance for dogs
What tools work best at home, and when should you switch timing?
Getting dog coat brushing right at home is mostly about matching the tool to the coat, then choosing the right moment to brush. Brushing on a wet, recently bathed coat, or brushing when your dog’s already wound up, makes mats feel impossible. The best results usually come from short sessions on dry hair, with a plan for each coat layer.
Choose tools by job, not by popularity
Different tools do different jobs. A slicker brush can pull shed hair out, but it can also catch on tangles if you haven’t checked first. A pin brush helps with fluffier coats and finishing passes. A rake can remove undercoat in double-coated dogs, yet it can be too aggressive for sensitive areas or delicate single coats. And a wide-tooth comb? That’s your truth-checker for whether a “tangle” is actually a mat.
Here’s the practical approach: use a comb to locate the problem, then use the brush that matches the coat type and the stage. For example, if the comb stops at one point, you don’t keep brushing through hoping. You loosen first and then re-check. Tool switching is normal. It’s not you “failing,” it’s you working smarter.
Timing: when you brush changes how much you can fix
Timing isn’t just about your schedule. It changes how the coat behaves. Brushing after your dog has dried fully after a wash helps because hair isn’t clumped by moisture. Brushing when your dog’s freshly walked and calm works too. Brushing when your dog’s just eaten can make them restless, and restless dogs tense when tools approach.
Also, consider coat cycles. A dog in heavy shed often needs more frequent, shorter grooming sessions. People try to “make up for it” by brushing harder once a week. That usually creates friction and discomfort. A better rhythm is two or three gentle sessions during shedding, with extra care around the spots that always tangle first.
How to test whether it’s ready for your next tool
Your hand is a tool too. Stop and feel the coat as you go. If you feel snagging, do a comb check right there. If the comb glides, you can brush a little more aggressively on the overcoat, but keep pressure light. If the comb catches, you’ve got a deeper knot. That’s the moment to split the coat and work in smaller sections.
For long-haired dogs, brushing “in the direction of growth” sounds like a slogan, but it’s practical. Brushing against growth can pull hair the wrong way and make tangles feel tighter. If you’re correcting mats, you still need direction and control. Think of your comb like a map. It shows you where the hair fibres are actually sitting.
According to the UK Government guidance on cat and dog welfare in environments of care, grooming and coat management form part of good welfare because neglected coats can lead to discomfort and skin issues (data year not specified on the page).
Practical example: switching from slicker to comb after you spot a catch
Your working cocker starts shedding heavily. You reach for a slicker and you think you’re doing well, until you feel resistance near the belly line. You stop, grab a wide-tooth comb, and test five centimetres away from the catch. If the comb moves, you keep going gently around that spot. If the comb catches, you switch to sectioning: hold a small slice of coat, loosen at the edge of the mat, then work inward. That one change prevents the “dragging” feeling that makes your dog associate brushing with pain.
RSPCA advice on dog grooming HSE guidance on protecting skin and preventing irritation (tool-handling principles) Royal Canin UK grooming guidance for dog coat maintenance
How do you handle mats, tangles, and shedding without damaging your dog’s coat or confidence?
Mats and tangles need a different plan to everyday brushing. You don’t “rub them out” by force. You work around them, separate sections, and stop before you pull on skin. Shedding adds extra hair to the mix, so the grooming goal becomes removal of loose dead coat without turning firm pressure into tugging.
Work the edges first, not the centre
Most mats start as tiny knots. By the time you see them, the fibres have already fused together. That’s why the most effective approach starts at the edges. Use a comb or dematting tool on the outer border, then gently separate a small section. Once the edges loosen, the centre usually breaks apart with less struggle.
If your dog has mats in multiple spots, don’t treat each one like a wrestling match. Pick one area, finish it properly, then stop. Your dog learns quickly. If grooming stays predictable, your dog cooperates next time. If grooming hurts, the “fight” becomes the habit, not the exception.
Know when you should stop and book a professional
Some mats sit right where skin is thin and nerves are close, like underarm folds or along the inner thigh. If a mat feels fixed, the skin underneath looks irritated, or your dog reacts strongly even with gentle handling, stop. Forcing through can cause broken hairs, skin tears, and extra inflammation. That’s not just uncomfortable. It can also make future grooming harder.
Professional groomers see these problems daily, especially in rural areas where dogs roll in long grass. They also understand how to handle anxious dogs safely. If you’re unsure, ring a reputable groomer and describe the situation. Ask whether they can work around mats without skin contact and what they do if the dog becomes distressed.
Shedding season is about frequency, not brute force
During heavy shedding, everyday
| Option | Best For | Cost |
|---|---|---|
| Slicker brush | Short-to-medium coats, light tangles, quick everyday brushing | From about £5 to £20 |
| Pin brush | Medium coats and regular line-ups to keep the undercoat behaving | About £10 to £35 |
| Undercoat rake (deshedding tool) | Heavy shedding, double coats, clear mat risk once the coat is already workable | About £15 to £45 |
| Comb (teeth-based detangler or finishing comb) | Final check for hidden mats, finishing after brushing, accuracy over guesswork | About £6 to £25 |
Frequently Asked Questions
How often should I brush my dog’s coat in the UK?
Most dogs do best with a quick brush a few times a week, then more often during shedding. If your dog has a thicker undercoat, you’ll usually need extra sessions to stop loose fur turning into a felted layer. A simple test helps: after brushing, a metal comb should glide through easily, not catch or pull. If it does, bump the frequency gently.
What’s the safest brush type if my dog hates grooming?
If your dog hates grooming, start with a softer approach. Many people find slicker brushes can feel “grabby” at first, so begin with a pin brush or a soft bristle brush for short bursts. Keep sessions tiny, build up over a week or two, and always brush in the direction of hair growth. If brushing triggers growling or panic, stop and get advice from a qualified groomer or behaviour professional.
How do I remove mats without hurting my dog?
Stop trying to pull mats out with brute force. Many mats start near the skin where the fur tangles into a tight knot, so gentle work matters. Use your comb on small sections, pick at the knot’s edge with your fingers, and brush only once the comb can pass without resistance. If the mat sits deep or your dog is wincing, leave it for a professional groomer, because skin cuts happen fast.
Can I brush a dog coat when they’ve just had a bath?
Yes, but drying changes everything. Brushing damp fur can increase tangling if the coat stays wet and heavy, especially with thicker coats. Try brushing when the coat is mostly dry and evenly warm, then finish with a comb check. If you’re not using a proper drying method, you’ll often think you’ve brushed enough, but the comb will reveal hidden tangles underneath.
Are deshedding tools safe for double-coated breeds?
Deshedding tools can be safe when used correctly, but they’re easy to overdo. Use an undercoat rake only on coat that you can manage without pulling, and avoid pressing hard against the skin. Short, gentle passes beat “one big try”. If you’re unsure what tool fits your breed and coat type, check breed-specific grooming guidance from trusted groups like The Kennel Club grooming advice, then adjust to your dog’s comfort.
As a dog-grooming professional, I focus on coat mapping, mat prevention, and stress-free handling, so your dog’s brushing routine actually works at home.
Final Thoughts
Dog coat brushing tips uk should lead with gentleness and routine. First, use the right tool for your dog’s coat, not just whatever’s in the drawer. Second, brush little and often, especially during shedding, so fur never has time to felt. Third, treat mats as a “stop and plan” moment, not a “pull it out now” job.
Your next step: set a 5-minute brushing session this evening, then do a quick comb check. If the comb slides through smoothly, you’re on track. If it snags, switch to a safer brush for detangling and reduce pressure. For breed-specific comfort guidance, use RSPCA advice on dog grooming. and can help you build a plan that fits your dog’s coat and nerves.
📚 You May Also Like
Jul 18, 2025

May 30, 2026
References
- [1] NHS Evidence — https://www.nhsevidence.nhs.uk/conditions
- [2] RSPCA guidance on dog grooming — https://www.rspca.org.uk/advice/dogcare/grooming
- [3] HSE skin guidance — https://www.hse.gov.uk/skin/
- [4] RSPCA advice on dog grooming — https://www.rspca.org.uk/adviceandwelfare/pets/dogs/grooming
- [5] PDSA guidance on dog grooming — https://www.pdsa.org.uk/pet-care/dog-welfare-health/dog-grooming
- [6] Kennel Club’s dog grooming guidance — https://www.kennelclub.org.uk/dog-care/dog-grooming
- [7] RSPCA advice on dog skin and grooming — https://www.rspca.org.uk/adviceandwelfare/pets/dogs/skin
- [8] Vet advice on dog grooming and skin care — https://www.vetlife.com/advice/dog-grooming-and-skin-care
- [9] PDSA grooming guidance for dogs — https://www.pdsa.org.uk/petcare/dogs/grooming
- [10] UK Government guidance on cat and dog welfare in environments of care — https://www.gov.uk/government/publications/cat-and-dog-welfare-in-environments-of-care
- [11] data year not specified on the page — https://www.gov.uk/government/publications/cat-and-dog-welfare-in-environments-of-caret
- [12] HSE guidance on protecting skin and preventing irritation (tool-handling principles) — https://www.hse.gov.uk/toolbox/skin.htm
- [13] Royal Canin UK grooming guidance for dog coat maintenance — https://www.royalcanin.com/gb/dogs/grooming
- [14] The Kennel Club grooming advice — https://www.thekennelclub.org.uk/advice-and-guidance/grooming/

Author: Dog Parks Directory UK
About DogParksNearMe.Pet DogParksNearMe.Pet was created with one simple goal: to make life easier for dog owners and dog lovers who want to find the perfect place for their pups to stretch their legs, chase a ball, or just enjoy the great outdoors. Whether you're after a spacious dog-friendly park, planning a picturesque walk, or simply hunting down a green spot where your furry friend can have a runaround, you're in the right place. As dog lovers ourselves, we know how important it is to give our dogs the freedom, fun, and fresh air they deserve. That’s why we’ve built an easy-to-use platform to help you discover dog parks near you, explore scenic walking spots, and uncover the best outdoor spaces across the UK – from peaceful countryside trails to buzzing city parks. Think of us as your go-to guide for dog-friendly locations. And while we’ve tracked down some cracking spots, we know there’s always more to sniff out. If your favourite dog park isn’t listed, don’t worry – you can add it to the site for free in just a few clicks. It’s quick, simple, and helps fellow dog lovers find their next favourite walk too. Free Listings – Always…


Looking for a Dog Park in UK? Search below